
I've always wanted to bake my own pita bread and it seemed like the simplest of things to bake, considering it was very much like an Indian flat bread / roti that I am used to making on a daily basis. The first time I made it, it didn't fluff up at all and it was really disappointing. I guess I had missed out on the temperature settings, which are really crucial here since the bake time is not more than 5 minutes. So I gave this a try this time around, baking it for Aparna's We Knead to Bake #14, where we could choose to bake anything we liked.
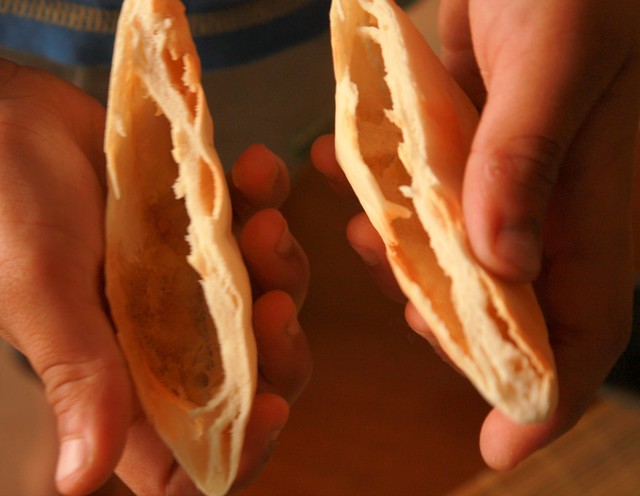
My son is over eager when the camera is out and insists on clicking pictures himself or arranging the setting. He was rushing around acting really busy with the camera dangling on his neck and looking for 'props'. I didn't want to spoil the fun for him, but I really had my heart in mouth, wondering just when that camera would crash into something. the only way I could get the camera back was by telling him that I needed to take a picture of him with the pita bread. Phew ! So here's a pic with him (and his big hands) holding the pita pockets
Serve the warm pitas with hummus or fill the pita pockets with falafels and some salad. Recipe for hummus coming up next
This is being YeastSpotted
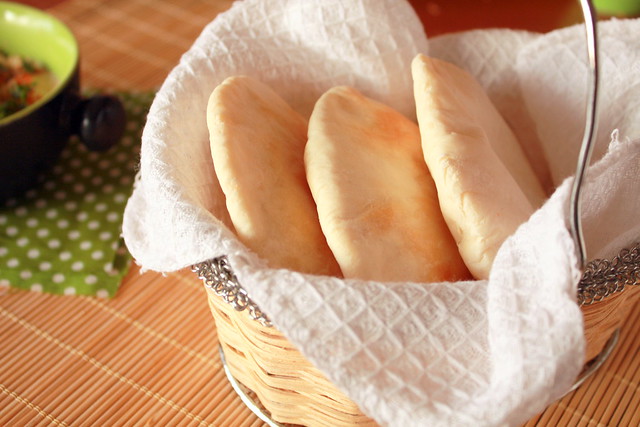
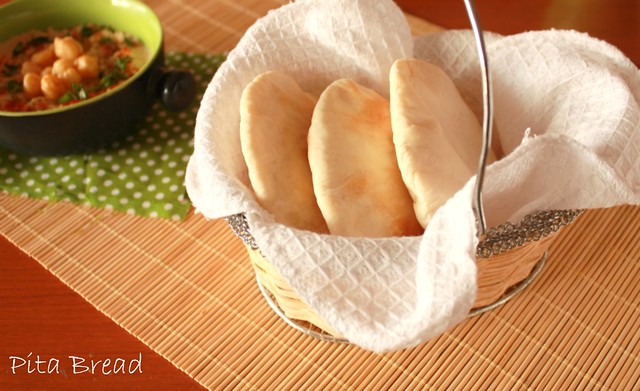
Pita Bread
Recipe Source - The Kitchn
Makes 6-8 small pitas
What You Need
1/2 cup warm water (not too hot to the touch)
1 tsp instant yeast
1/2 tsp sugar
1.5 cups maida / APF
1/2 tsp salt
1-2 teaspoons olive oil
What you do with it-
In a bowl, add the flour, sugar and yeast. Slowly pour in the warm water into this and stir
Add the salt and oil and start kneading it. I prefer working with the dough on a clean counter-top
Add a little flour if it gets too sticky and knead till it forms a smooth dough
Place this in a well-oiled large bowl and allow it to rise for an hour or so, till it doubles in size
Once its rise, punch it down and then divide into 8 small balls
(At this point, the dough can be refrigerated in a cling wrap if its not going to be used rightaway)
Using a rolling pin and a little flour, flatten the ball to form a small round (about 3" dia and 1/2" thick)
Pre heat the oven along with the baking tray to 220 C or 450 F
Place the rolled-out pitas directly on the baking tray / baking sheet and bake for about 3 minutes
The pita will start to puff up after a minute or two
You can also bake them on the stove top using a skillet. You will need to flip over the pita and cook on both sides if using the stove-top method
Keep the baked pita covered in a clean cloth
Serve immediately to really enjoy the fresh and fluffy pita
Serve with some hummus or use the pita pockets and stuff with falafels and some salad
1 comment:
The pitas look perfect. You are so right about kneading being over-rated, especially when you have a large batch.
Post a Comment